| TVET CERTIFICATE IV in MULTIMEDIA |
MMDSC401 Set up digital camera k
Sector: Media & Filmmaking
Sub-sector: Multimedia

Module Note Issue date: Feb, 2022
Table of Contents
| Elements of competence and performance criteria | PageNo: | |
| Learning Unit | Performance Criteria | |
| 1.Select and prepare digital camera Equipment and accessories | 1.1. Proper confirmation of equipment and stock requirements for the shoot 1.2. Cleaning of equipment and ensure that it is operational. 1.3. Proper verification of faults and defects and refer these to specialist technicians. 1.4. Adequate identification of all required stock and consumables and ensure that it is present in sufficient quantity to meet the filming requirements. | 4 |
| 2.1. Correct verification of appropriate power supply 2.2. Correct verification of charger if is suitable for the batteries used 2.3. Safe charging of the batteries according to manufacturer's recommendations 2.4. Proper maintenance of charged batteries to meet the requirements of shooting duration | 32 | |
| 3.1. Accurate determining of the support requirements and position of digital camera 3.2. Proper installation of supports in the appropriate position and at the appropriate height to achieve the digital camera shot required 3.3. Correct verification of the support to its security, avoiding damage to any equipment and provision of satisfactory digital camera support | 36 | |
| 4.Install digital camera, lenses and other accessories | 4.1. Proper Selection and secure fitting of the correct digital camera lens and filters according to the identified creative requirements 4.2. Correct installation of other digital camera accessories and special requirements 4.3. Thorough lifting of digital camera, using safe lifting and handling techniques and secure to support, if required 4.4. Adequate Securing of digital camera safely to avoid damage | 47 |
| 5.Disassemble digital camera, accessories and support equipment | 5.1. Proper breaking down and carrying of digital camera, accessories and supports employing safe lifting techniques 5.2. Proper Cleaning and safe packing of all equipment into cases to avoid damage and prepare for transport 5.3. Regular reporting and documenting of any equipment that is damaged and requires maintenance to the relevant personnel 5.4. Correct leaving of the photo capturing site in the original or improved Condition, ensuring that there has been no adverse | 62 |
Learning Unit 1 – Select and prepare digital camera Equipment and accessories
Definition: A camera is an optical instrument to capture still images or to record moving images, which are stored in a physical medium such as in a digital system or on photographic film. A camera consists of a lens which focuses light from the scene, and a camera body which holds the image capture mechanism.
L O1.1: Confirm the equipment and stock requirements for the shoot.
· Content/Topic 1: Equipment features, condition and specifications
Resolution
This term refers to the sharpness, or detail, of a picture. The higher the number of pixels, the higher the resolutions. You can determine the resolution you need by determining what you really want to do with these pictures. Picture size is measured by how many pixels make up an image and is measured by horizontal by vertical resolution, as in 1280 x 960.
Memory
Digital cameras store pictures as data files rather than on film. The size of your memory determines the number of pictures you can take before downloading the images to a computer, at which time you can go back and fill the memory up with new pictures. Most cameras come with only 8 megabytes (MB) of memory, which for a 2 or 3 mega pixel camera could be only 10 to 40 photos. More memory is available by buying removable memory, such as a memory card. The type of memory you buy will be determined by the type of camera that you buy. 128MB of memory is a good starting place, allowing you to take a good number of photos before having to download to your PC.
Flash Type
A flash, of course, is the extra light needed to shoot inside or in low-light conditions. Most digital cameras have built-in flash with a range of 10 to 16 feet. Other flash options include: Red Eye Reduction - Two flashes are emitted, the first to contract the iris so that the eye doesn't reflect as much light with the second, which keeps friends and family member from looking fiendish in the photo.
External Flash - More powerful than automatic, this allows you to attach the flash to the camera and place it strategically. The types include "flash sync" and "Hot Shoe." Cameras that include external options will generally have automatic flash as well.
Optical Zoom - there are 2 types of zoom lenses, digital and optical. Digital zoom simply enlarges the picture without adding any clarity of detail. The same thing can be done with editing and cropping software. Optical zoom will do what you really want; add detail and sharpness. The larger the lens (2x, 3x, which is standard, 4x, etc.) the more picture taking flexibility you have
Lenslength will determine how much of a scene will fit into a picture. Some cameras have fixed focus lenses, which are preset to focus at a certain range. These pictures typically focus between a wide angle lens and normal range. Many cameras have auto focus, which pick an item in the center of the viewfinder around which to focus. To get an idea of a camera's range, it will be listed as the 35mm equivalent.
LCD Screen - this screen will let you see what the photo will look like and, typically, let you see what you've already taken and erase what you don't need. The screens use a lot of power, but are very desirable for editing purposes. Some cameras will let you display multiple pictures on the LCD screen at one, usually 9 or 12 at a time.
Self-Timer - this is an option that lets the photographer be included in the photo. Self-timers have a pre-set delay, usually giving you about 10 seconds to run into the shot. There are also cameras with a remote control option to work the shutter.
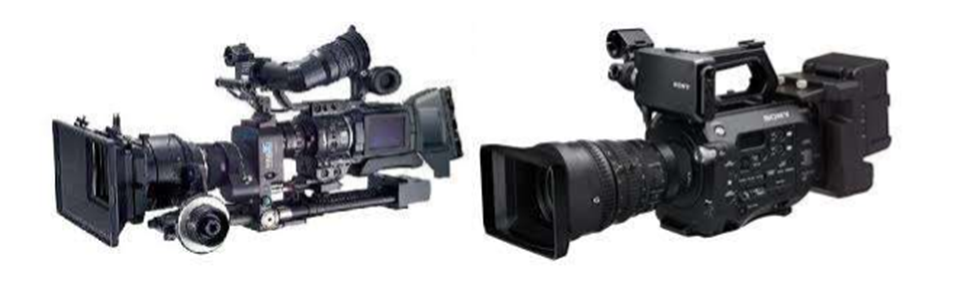
CONSUMER CAMERAS
There are simple cameras designed for personal use by non-professionals. In general, they are used for everyday life to just take images where professional work is not primordial.

They share many things in common
- Lower price $200-1500$
- Smaller imaging chip
- Small and simple operations
- Most of the settings on them are full automatic
- They do not have xlr audio inputs.
- Fixed lenses
PROSUMER CAMERAS
They are the intermediate class of cameras packed with the important feature to help you to create an image.
This range of camera is the most used by the beginner filmmaker and most of the TV production.

- Low mid-range price 1500$-10,000$
- Full manual image control
- Have xlr audio inputs
- Medium to large imaging chips
- some are interchangeable lenses
- Ability to record time code for in and out for multi camera job
Professional cameras
It is hard classify the different between the so called professional and prosumer camera but the standard feature is the price. The professional camera can go up to 50,000 $ and beyond. They have many features to help achieve a good image and even more flexibility to work with many other devices.
Professional cameras tend to be big and heavier and they
- Higher price -10000-50000 and beyond
- XLR audio input
- Interchangeable lenses
- Time code input for multi camera work
- Larger imaging chip (superior color processing)
- They offer the highest quality image
Superchip camera
Very large imaging chip
Interchangeable lenses
Affordable price 6000s-20000s

Example of super chip camera
- Sonny PMW-F3
- RED cameras
- Canon Eos c300
- Panasonic AG-AF100
DSLR CAMERAS
DSLR the new and rapidly expanding camera. They are designed to record photo as their primary job but they do also record high video quality. DSLR stand for digital single lenses reflex.

- Low mid-range price
- No xlr audio inputs
- Very large imaging chip
- Interchangeable lenses
Compare the DSLR camera to prosumer, they offer good quality image but they have some major limitation such as +--+
- Manually audio control
- Zebra stripe to judge exposure
- Peaking to judge focus
- Modernize zoom control
- Limited recording time (12-29) min
· Content/Topic 2: Planning of the required equipment
ü Digital Camera
ü Tripod
ü Lens
https://youtu.be/IyBTB5FHjes
ü Filters
ü Rain cot
ü Reflectors
ü Camera Batteries
ü Power supply
ü Light
ü External Flash
ü Camera bag
ü Audio-visual aids (DVDs, pictures)
ü Laptop
ü Storage device
How does the camera works?
A camera lens takes all the light rays bouncing around and uses glass to redirect them to a single point, creating a sharp image. When all of those light rays meet back together on a digital camera sensor or a piece of film, they create a sharp image.
What is camera used for?
Digital cameras use an electronic image sensor, usually a charge coupled device (CCD) or a Complementary Metal Semi- Conductor (CMOS) sensor to capture images which can be transferred or stored in a memory card or other storage inside the camera for later playback or processing.
Digital Camera equipment
1. Tripod: In photography, a tripod is used to stabilize and elevate a camera, a flash unit, or other photographic equipment. All photographic tripods have three legs and a mounting head to couple with a camera.
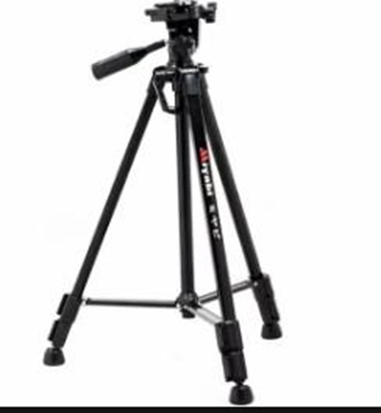
Table Tripod
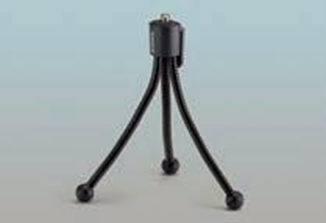
Pocket Tripod

Multi-Level Table Tripod

Quik Pod DSLR Action― Handheld Tripod & Monopod

2. Lens: A camera lens is the part of a camera that directs light to the film or, in a digital camera

3. Filters:A software routine that changes the appearance of an image or part of an image by altering the shades and colors of the pixels in some manner. Filters are used to increase brightness and contrast as well as to add a wide variety of textures, tones and special effects to a picture
Image
| |
| |
| |
| |
4. Rain coat: it’s like a protection of rain
Image

5. Reflectors: What are reflectors in photography?

In photography and cinematography, a reflector is an improvised or specialized reflective surface used to redirect light towards a given subject or scene.
Image
6. Camera Batteries: Rechargeable lithium-ion (Li-ion) batteries are the most commonly used style of battery in digital cameras, particularly in DSLRs. They are lighter, more powerful, and more compact than NiMH batteries, and they aren't affected by cold weathe Image

SD Memory Cards (Secured Disk)

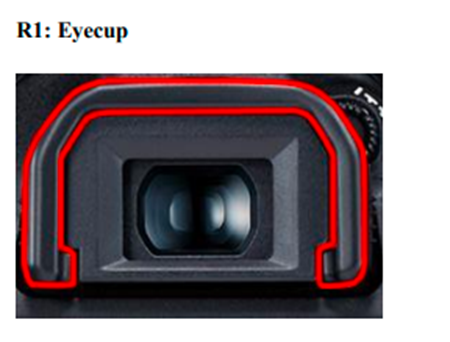
Viewfinder
Screen attachment shaped like a light shield with a built-in loupe for DSLRs and CSCs with 3‖ LCD. Allows for perfect framing and focus control when shooting and trouble-free image review under any ambient light condition.

7. Power supply: CCTV Camera Power Supply Most CCTV cameras are either 12V DC or dual voltage, which means that they can use either. Please note that connecting a 12v security camera to a 24v power source will almost always burn the camera ‘s circuit board and render the camera useless.
CCTV (closed-circuit television) is a TV system in which signals are not publicly distributed but are monitored, primarily for surveillance and security purposes. CCTV relies on strategic placement of cameras and private observation of the camera's input on monitors.
8. Light External Flash: An external flash is a great tool, a valuable asset in a DSLR or advanced compact owner's camera bag, and the more you can control the light that comes out of it and that hits your subject, the better your photos will look.
| |

Audiovisual (AV) means possessing both a sound and a visual component, such as slide-tape presentations, films, television programs, church services and live theater productions. Audiovisual service providers frequently offer web streaming, video conferencing and live broadcast services.
10. Laptop: Computer is used with camera Storage devices of cameras:
All new Sony cameras also have two memory slots, one for its Memory Stick and one for SD Card, but not hot-swappable. A few cameras used other removable storage such as Microdrive ‘s (very small hard disk drives), CD single (185 MB), and 3.5" floppy disks.
POWER SUPPLY OF CAMERA
Wall plug Universal AC input adjustable output adapter for digital cameras. This is a compact, high quality, switch mode regulated power supply with adjustable output adaptable to many digital cameras. It has a folding plug making it convenient for travel or storage
Three types of power supply of camera
There are three major kinds of power supplies:
Ø unregulated (also called brute force),
Ø linear regulated,
Ø Switching.
What is the difference between a battery and a power supply?
Ø The difference is that the battery has higher impedance, especially at the frequencies you are using, than the nicely regulated power supply Of course no supply has exactly o impedance, but the regulated power supply is a lot closer to this than the battery, and that difference is enough to upset your circuit.
CCD
A charge-coupled device (CCD) is a light-sensitive integrated circuit that stores and displays the data for an image in such a way that each pixel (picture element) in the image is converted into an electrical charge the intensity of which is related to a color in the color spectrum
Knowing the Different Parts of the Camera

Front side

Red-eye reduction:

If red-eye reduction is enabled on your camera, half-pressing the shutter button will light up this lamp when you use the built-in flash. Self-timer: When you set the self-timer, this lamp will blink for the duration of the timer until the picture is taken.
F4: Lens Mount Index

F6: Mirror


V1: AF Point

V3: Aperture Value


monitor, which allows you to alter the angle of the monitor during Live View shooting, making it easier to capture low-angle or high-angle shots.
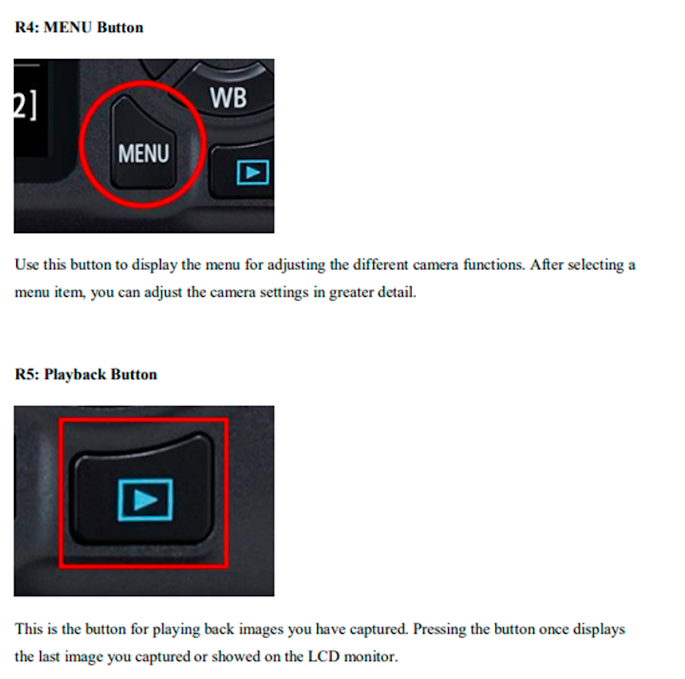
R6: Wi-fi Lamp

R8: SET Button/Multi-controller

R10: Quick Control Button

R12: Erase Button


T1: Focus Mode Switch

T3: Strap Mount

T5: Power Switch


B1: Card Slot, Battery Compartment

L O 1.2.-Clean equipment and ensure that it is operational
Cleaning Your Camera
· Content/Topic 1: Selection of the real chemical product and cleaning tools
Eclipse/Methanol
Methanol is a nondrinking type of alcohol (also known as wood alcohol and methyl alcohol) which is mostly used to create fuel, solvents and antifreeze. A colorless liquid, it is volatile, flammable, and unlike ethanol, poisonous for human consumption.
Rocket blower
Rocket Blower is a powerful tool for cleaning all of your camera gear including cameras, lenses and filters. This rocket blower produces a powerful gust of air to blow away any surface dust with ease.
• A safe and effective way of cleaning and maintaining your gear
• Suitable for cleaning Cameras, lenses & Filters
• Easy to use

Cotton or Polyester Tipped Applicator
Polyester tipped applicators are non-absorbent, containing no fatty acids or latent sugars. These applicators are ideal for laboratory settings and diagnostic sampling. Sterile and non-sterile options are sold by the box or case.
Brush
A brush is a common tool with bristles, wire or other filaments. It generally consists of a handle or block to which filaments are affixed in either a parallel or perpendicular orientation, depending on the way the brush is to be gripped during use

Speck grabber
Speck grabber is a unique tool designed to remove individual contaminant particles from delicate
and sensitive surfaces without danger of damaging or causing additional contamination.
What to clean camera body with? Clean with alcohol or lens cleaner
If necessary, use a high-concentration isopropyl alcohol or lens cleaner on a lens tissue to clean the LCD screen and remove any fingerprints or nose marks. You only need a drop or two of the cleaner on the tissue
An important part of owning a camera is keeping it ready for use. Lens glass attracts specks of dirt and dust, while moisture from condensation, rain, or spray leaves a mineral residue. In addition, dust particles get onto camera sensors, often when changing lenses. Cleaning your camera with the right equipment and technique is imperative. Dirt can cause dark spots and blobs on your photos, and light reflecting from dust particles may cause white spots. While camera stores will clean your equipment for a fee, it’s possible to do it yourself with the right photography accessories for camera and lens cleaning.
Kits for Camera Sensor Cleaning
The most common problems are visible spots from tiny particles of dirt on your camera sensor. You can see these specks with special sensor magnifiers and remove them in several ways. One method is to use a small filtered air blower; another is to wipe the sensor with special swabs, brushes, and cleaning solutions. Complete sensor cleaning kits contain everything you need to clean your camera sensor and to remove smears and stubborn dust particles. Always take care when cleaning camera sensors, and carefully follow the instructions.
LCD Screen Cleaning
LCD and plasma screens attract dust and need regular cleaning. A microfiber cloth removes surface dust without scratching plastic screen surfaces. It may help to wet the cloth with a screen cleaning solution to remove smears and stubborn dirt. LCD screens aren’t waterproof, so don ‘t spray cleaning solutions directly on the screen. Antistatic, disposable wipes are convenient and contain cleaning fluids that loosen dirt safely. Other products include mini cleaning rollers, chamois cloths, and cleaner kits.Display and screen cleaning suppliescan also clean smart phones, tablets, and LCD screens.
· Content/Topic 2: Cleaning procedures
Clean a Camera Lens, Step 1: Use a blower to remove dust
If a blower didn’t do the job, a brush should be next on the list. Brush tips are made of various materials but camel hair is a popular choice because the fine, soft hairs help to prevent damage.
The main reason brushes are riskier than a blower is because they can pick up substances if you aren’t careful. Don‘t touch the brush with your fingers to prevent oils from transferring over and make sure the brush stays capped or bagged to stay clean. Oils can be difficult to remove from lenses but they are even more difficult to remove from a brush you contaminate.
The original lens brush has been popularized by the brand Lens Pen (2nd from the right in the photo above). It features a brush that slides out for use, and slides back in to stay clean. The other end is is a carbon-soaked polishing tip, designed to clean oil from fingertips and various sources without damaging the lens. Many competitors now produce the same product as well.
Do ‘s:
• Use a brush with soft, fine bristles to avoid scratches; camel hair is a great option.
• Gently brush the lens surface to remove dust particles.
• Cap the brush after use to prevent contaminations.
Don ‘t:
• Don‘t jam the bristles onto the lens surface.
• Don‘t touch the bristles with your fingers or anything other than the lens.
Clean a Camera Lens, Step 2: Spray lens using lens cleaning fluid
The most potent (and messy) lens cleaning option is a spray bottle of cleaning fluid. Like remoistened wipes, these are typically alcohol-based cleaners that can clean your lens surface without streaking and quickly evaporate to protect your gear.
Bottles of cleaning fluid typically come in 1 oz, 2 oz, and 8 oz sizes and range about $6-8 per bottle. Cleaning fluid can be used with cleaning tissues or microfiber cloths. Avoid using facial tissues or anything that may be laying around since they can cause scratches.
Some folks dislike this method since it can leave streaking and you are required to use cloths, which pose their own risks. However, streaking can typically be dealt with by reapplying cleaning fluid and re-wiping the surface.
Do ‘s:
• Always use a dust-free option like lens tissues or a lens cloth and spray onto those before applying.
• Only use cleaning fluid made with denatured alcohol.
Don ‘t:
• Don ‘t spray directly onto the cleaning surface since it can get into the lens.
• Don ‘t use cleaning fluid that’s mostly detergent and water–this can make the problem worse.
Clean a Camera Lens, Step 3: Wipe lens using a lens cleaning paper tissue
Lens cleaning paper tissues are a safe and inexpensive option for cleaning. Each tissue sheet costs around $0.05. Since you use them once and then discard, it ensures you start with a dust and contaminant-free sheet for cleaning each time.
Microfiber lens cleaning cloths are an effective way to clean smudges. These cloths will cost you on average $2-4 dollars each but some cost as much as $10, depending on the brand. Microfiber cloths are pricier than lens tissues and are meant to be used for a long time before getting discarded or washed.
They can also be a bit trickier than tissues to maintain. One downside is any oil or grime you clean off the lens remains on the cloth. Additionally, reusing a cloth poses the risk of trapping something in the cloth and dragging it across your lens, leaving a scratch. In between uses, you should keep them sealed in a plastic bag to prevent further contamination.
Do‘s:
• Store your cloth in a plastic bag to prevent contamination.
• Work the cloth in concentric circles beginning in the center of the lens.
Dont‘s:
• Don‘t wash these with fabric softener as they can leave behind chemicals that leave streaks.
• Don‘t use t-shirts, tissue paper, or paper towels to clean your lens.
Pre-moistened lens cleaning wipes are the next step up in terms of lens cleaning potency. Alcohol in the wipes help break down and clean off smudges.
It can be handy to keep a few wipes in your camera bag for particularly stubborn smudges. Wipes are disposable, so they are safer and more convenient option than a cleaning cloth.
L O 1.3: -Verify faults and defects and refer these to specialist technicians.
· Content/ Topic 1:Determination of the fault of equipment
If you have the ability to see images produced by a lens or camera body you can look for some things such as dark spots, which may indicate dust or dirt on the lens, or banding which may indicate some deeper malfunction. For a lens, the most common problems show up as poor focus, or uneven focus across an image.
What is` sensor dust?
If you own a DSLRor mirror less interchangeable lens camera, you will at some point have to deal with sensor dust, whether you like it or not. Dust is a normal fact of life and it is all around us, even at our homes that we try to keep clean at all times. The dust lands on both the lens and the camera body and due to the ―breathing‖ mechanism of the lens while zooming in/out and focusing, the small dust particles end up getting sucked into the camera body. All lenses breathe one way or another or else the internal elements would not be able to move for autofocus and zoom functions. If you use more than one lens, the dust might be able to get into the camera body during the process of changing lenses.
Once the dust is in the camera body, it will either fall on the bottom of the camera or move around until it lands somewhere. Some dust particles land on the mirror inside the camera and others might end up getting stuck on the camera sensor. So, as you can see, there are three main areas where dust might settle in:
1. The camera mirror – when dust ends up being on the camera mirror, you will not see it in your images, but you will see dust particles when you look through the viewfinder. This one is just annoying and it can be easily cleaned either with a small brush or a blower like Giotto‘s Rocket Blower.
2. The lens exterior, front and/or its back element – while very small dust particles will not affect image quality, the larger ones and dirt/grease will decrease contrast and might even possibly degrade image quality. Always make sure that both the front and the rear elements are clean and dust/dirt free.
3. The camera sensor – the worst case scenario, because the dust particles will show up in every image, especially when stopped down to small apertures like f/10. Cleaning the camera sensor is not easy and the process requires special tools that need to be used with extreme care.
· Content/Topic 2:Reading the manual
The best way to use your camera manual
Begin to skim with your camera in your hands. Look through the contents and take note of what’s covered. Mark which items you think may be of particular interest to you. Some you will be able to just glance over. Others may be just painfully obvious, like this from the Nikon D800 manual;
“When operating the viewfinder diopter adjustment control with your eye to the viewfinder, care should be taken not to put your finger in your eye accidentally.”
Carry your manual with you
Download a PDF of your camera manual to your phone. Take it with you everywhere so you can refer to it when you get stuck with a camera setting.

With your camera in your hands, go through the manual from the very beginning. Look at the diagrams, and find each item on your camera body. Even if you don’t understand what something is yet, find it on your camera. Later, as you read more detail, everything will start to come together. Read every page, even if it doesn’t make sense at first. Getting a nice camera is a big investment, so wouldn’t you want to know what it can do?
Camera manuals usually have very basic instructions near the beginning of the manual to get you shooting, almost right out of the box. Feel free to read that part, and begin using your camera right away, but don’t stop there! As you work your way through the manual, you will discover the reason you wanted a DSLR in the first place.
Underline the Key Words

As you are reading through and learning, have a pen handy. Underline (or highlight if that’s your thing) key words that will help you focus on what is most important. Sometimes manuals can be wordy, and hard to understand. If you can zone in on the most important words, it will become more clear. Later, when you are trying to find something, those underlined words will pop out and make it easier to find.
Take notes in the margins if you try something, love it, and know that you will want to remember that in the future. Add an extra tab or sticky note there, or put a star next to it. It’s hard to remember everything you read after one read-through, but if you can quickly go back to your starred items and practice those often, you’ll be well on your way to mastering your camera.
RECOMMENDATIONS
Do not leave the lens pointed at the sun or other strong light sources.
Light focused by the lens could cause fire or damage to product’s internal parts. When shooting backlist subjects, keep the sun well out of the frame. Sunlight focused into the camera when the sun is close to the frame could cause fire.
Turn this product off when its use is prohibited. Disable wireless features when the use of wireless equipment is prohibited
The radio – frequency emissions produced by this product could interfere with equipment on board aircraft or in hospitals or other medical facilities.
Remove the battery and disconnect the AC adapter if this product will not be used for an extended period.
Failure to observe this precaution could result in fire or product malfunction.
Do not touch moving parts of the lens or other moving parts.
Failure to observe this precaution could result in injury.
Do not fire the flash in contact with or in close proximity to the skin or objects.
Failure to observe this precaution could result in burns or fire.
Do not leave the product where it will be exposed to extremely high temperatures, for an extended period such as in an enclosed automobile or in direct sunlight.
Failure to observe this precaution could result in fire or product malfunction.
Danger (batteries)
Do not mishandle batteries
Failure to observe the following precautions could result in the batteries leaking, overheating, rupturing, or catching fire:
Ø Use only rechargeable batteries approved for use in this product.
Ø Do not expose batteries to flame or excessive heat.
Ø Do not disassemble.
Ø Do not shot-circuit the terminals by touching them to necklaces, hairpins, or other metal objects.
Ø Do not expose batteries or the products in which they are inserted to powerful physical shocks.
If battery liquid comes into contact with the eyes, rinse with plenty of clean water and seek immediate medical attention.
ü Delaying action could result in eye injuries.
· Topic 3: Communication channel, Fault diagnosis and Fault handling
What do you do if your camera is not communicating with your lens when you turn on the camera? Or it won‘t write to the card you just placed inside? Or it shows an error on your display? don‘t panic. There are a few simple things you can try that may just fix the error.
What was the last item you attached? A different or new lens? A memory card? New battery? Remove the item you last attached to the camera.
If it is a lens, try attaching another lens (if you have one) to determine if it is the camera or the lens causing the problem. If the camera works fine with another lens, then you know it‘s the lens causing the problem and you can try the steps below to troubleshoot the problem
Important Note: If following the respective solutions mentioned here does not fix your EOS camera errors or problems, then it is highly recommended that you must visit the nearest Canon Camera Service Center.
1. Error Code – Err 01
When you get Err 01 on your camera, it means that the communication between lens and camera is not working.
Solution: Very gently clean the camera lens and the electrical contacts (the area highlighted in red color) with the use of dry and clean cloth.
Precautions
While cleaning the contacts, you have to take care of following Never use wet cloth to clean contacts.
• Never touch the contacts directly with hands. If you touch it with your hands, then it will cause corrosion and thereafter you camera may become inoperable.
• Be careful while cleaning the contacts on lens side and make sure you do not damage the lens surface.
2. Error Code – Err 02
You get this Err 02 message, because camera is not able to access or read memory card.
Solution: Follow these solutions. In most of the cases it has solved the problems.
• Eject and re-insert the memory card
• Format the memory card as it is mentioned in the user manual (the manual book that you have received with your camera). You can also visitCanonofficialwebsiteto download user manual for your EOS camera.
• You can also use computer to format the card.
• If formatting card does not fix the problem then you mustreplacethecardwith new one.
3. Error Code – Err 03
If your EOS digital camera showing you Err 03, then it means that there are lots of folders saved on the memory card.
Solution: It is very simple to fix EOS error 03 code. Simply move the folders from your card to PC and then delete them from the card.
But if you do not want to delete folder from card, then simply replace the card with formatted memory card.
4. Error Code – Err 04
If your camera is displaying Err 04 code, it means that your camera is not able to save photos because the memory card is full.
Solution: Delete unwanted photos/videos or other files from the card to free up the space. Or you can move all the photos on your computer/pen drive or on any other data storage devices and then format the card. It will help you to resolve this issue.
5. Error Code – Err 05
When built-in flash could not be raised, then camera displays the error code – Err 05.
Solution: The quick solution to fix err 05 is to Switch OFF the camera and then Switch it ON again.
6. Error Code – Err 06
Your camera will display an error (err 06) screen ―Self Cleaning Sensor Unit malfunction. Consult with Canon Service Center.‖
Solution: Turn the power switch to OFF and then turn ON the power again. This will solve your problem.
7. Error Code – Err 10/20/30/40/50/70/80
Err 10 – A file system malfunction has been detected.
Err 20 – A mechanical malfunction has been detected.
Err 30 – A shutter malfunction has been detected.
Err 40 – A power malfunction has been detected.
Err 50 – An electric control malfunction has been detected.
Err 70 – An image related malfunction has been detected.
Err 80 – An image or electric control malfunction has been detected.
Solution: The quick solution to fix Canon EOS error codes err 10/20/30/40/50/70/80 is to Switch OFF the camera, remove the battery out of the camera wait for 15-20 seconds and then re-install the battery and Switch ON the camera again.
Hopefully, you will now not get Err 10, 20, 30, 40, 50, 70, 80.
8. Error Code – Err 60
EOS camera err 60 displays – An error occurred preventing shooting, the lens movement may be obstructed.
Solution: Check the camera lens is clear and make sure nothing is obstructing it. After this Switch OFF the camera and Switch ON it back again.
9. Error Code – Err 99
Camera error code – err 99 is a general error and it can occur due to various different causes.
Solutions: Follow the different solutions for fixing camera error code Err 99:
• Switch OFF the camera, remove the battery and then re-install it and then Switch ON the camera.
• If above solution fails, then gently clean the camera lens and the electrical contacts (the area highlighted in red color) with the use of dry and clean cloth.
• Gently clean the electrical contacts and flash with the help of using dry and clean cloth.
Precautions
While cleaning the contacts, you have to take care of following things:
• Never use wet cloth to clean contacts.
• Never touch the contacts directly with hands. If you touch it with your hands, then it will cause corrosion and thereafter you camera may become inoperable.
• Be careful while cleaning the contacts on lens side and make sure you do not damage the lens surface.
10. Error Message – AC
In the film camera, the imaging element is in contact to the film. And if dust or dirt gets on this imaging element, then black spots gets recorded on that specific part of the image.
Solution: In order to fix AC error message, you must clean the imaging element with the piece of cloth. Also make sure that while cleaning, you should connect EOS camera to your home power outlet by using the DC coupler.
If you do not remove the battery while cleaning the imaging element, then your camera will display the cleaning warning message ‗AC‘ on its LCD screen and it will not allow you to clean the imaging element.
You can refer to the user manual that you have got along with the camera. You can also look for user manual for your EOS camera on the official Canon EOS camera support page.
11. Error Message – bu59/bu54/buSY/busy
If your EOS camera is showing you bu59, bu54, buSY or busy message, it means that your camera is having following issues:
The flash is recycling. For example – If you shoot 30 pictures with flash at short intervals, the flash may stop working. This happens in order to protect flash unit.
Or Continuous Shooting has taken place. It means that camera memory card is full and cannot continue to shoot.
Or camera is connected to a PC, Mac or printer.
Solution: If you press the shutter button halfway and if error message displayed on the Camera‘s LCD screen or in the viewfinder, then allow LCD display to get turned OFF. This will give time for either buffer memory to clear or flash to recycle, allowing full use of the camera again. In case, if your camera is connected to Printer, PC or Mac, then simply disconnect the camera, before you try to use it again.
Important Note: If your EOS camera display ‗buSY‘ error message, then it is suggested that you must do not switch OFF your camera or else it may create issue with the EOS camera or memory card.
12. Error Message – Battery level is too low. Cannot clean sensor
If your camera is showing you error message ―Battery level is too low. Cannot clean sensor‖, then it means that battery is not able to provide enough power and hence it makes the shutter to close during the close of the shutter curtains and image sensor, and it may lead to possible damage to the image sensor.
Solution: To fix this error message, you must use fully charged battery or you can use your home power outlet before you proceed to clean the image sensor.
13. Error Message – Cannot Play Back Image
When you try to play back images on the camera and if it display ‗Cannot playback image‘. This error can occur due to following reasons:
When you try to play back images that was taken with a non-Canon camera.
The images have been moved to computer and edited or rotated and then it is transferred back to the memory card.
Or memory card is malfunctioning.
Solution: Transfer the images to PC and check if it opening properly. If you own multiple memory cards, format another cards and take some test shots.
If the images are opening properly, then it is the card that is malfunctioning and it is responsible for showing this error message. To fix this problem, you can format the memory card as it is mentioned in the user manual.
14. Error Message – CbC
This warning error message is related to the date/time battery level. The date/time battery is responsible for maintaining the camera‘s date and time. The CbC error message appear on the LCD screen, when the date/time battery power gets low.
Solution: Change the date/time battery with new battery as the steps mentioned in the user manual.
15. Error Message – CLEAn/CLn/CCd
The image sensor is like the film in a film camera. If any dust or dirt gets on the image sensor, then it will display up dark spot on the photos. The mirror will lockup and shutter will get open and ‗CLEAn ‘, ‗CLn ‘or ‗CCd ‘will appear on the camera ‘s LCD screen.
Solution: Switch OFF your phone and then Switch ON it again in order to automatically activate the sensor cleaning function.
You can also manually activate the senor cleaning function. Below follow the steps:
• Go to Menu and under the Set-up tab, choose ‗Sensor Cleaning ‘and then press the SET
• Turn the ‗Quick Control Dial ‘in order to choose ‗Clean Now ‘and press the SET
• Now select ‗OK‘and press the SET The screen will display cleaning and your camera will make shutter sound, but no images will be clicked.
16. Error Message – ErrCF/CardErr/Folder number full
When the folder number reaches 999 or when the image file number reaches 9999, this EOS camera error ErrCF, CardErr or Folder number full, appears even when there is enough memory is available on the card.
Solution: Eject and re-insert the memory card. Use another memory card or transfer all the images from card to PC and thenformatthecardwithin the camera. Your card will return to normal and you will not get such error.
You can also replace the card with new compact flash memory card. When you install a new compact flash card, the folder number start with 100 and the image file starts from 0001.
17. Error Message – FullCF/CardFull/CF Card Full
When your Canon EOS camera display following error message: FullCF, CardFull or CF Card Full, then your camera will refuse to take shot or record video.
Solution: Transfer all the images from the Compact flash memory card to PC or any other data storage devices or you can also delete unwanted image form the card to free up the space. If above mention solutions fail, the simply replace the card with new Compact flash memory card.
18. Error Message – L
Canon EOS camera L error message appear when LOCK Switch is set to right and you try to attempt one of the locked camera controls. The error message appears on the camera‘s LCD screen or in the viewfinder. And [LOCK] will be displayed on the shooting settings.
Solution: The quick solution to fix L error message is to set the [LOCK] switch to the left and turn ON its functions.
19. Error Message – No CF/No CF Card/No Card in Camera
The EOS camera error messages: No CF, No CF Card, No Card in Camera is displayed:
• When you press the shutter button and there is no Compact Flash memory card installed.
• When you start the camera and there is no Compact Flash memory card installed.
• Or, when you try format the card and there is no Compact Flash memory card installed.
Solution: In order to get rid of No CF/No CF Card/No Card in Camera error messages, simply insert the compact flash card (CF card) within the camera.
Important Note: While fixing any of the above mentioned Canon EOS camera, if you lose your important images from your camera‘s memory card (such as while formatting Compact Flash card or from any other cards, etc), then it is highly recommended that you must usePhotoRecovery,in order to restore erased photos from Canon EOS Camera.
L O 1.4: - Identify all required stock and consumables and ensure that it is present in sufficient quantity to meet the filming requirements.
Topic 1: Technical Arrangement of the electronic equipment
What are the equipment of electronics?
Electronic Equipment means any electronic equipment including, but not limited to mobile phones, laptops, computers, scanners, printers, word processors, electronic processing systems, photocopiers, facsimile machines, electronic cash registers, electronic scales and electronic testing or analyzing.
· Content/Topic 1: A Multimedia certificate may be useful in the following career areas:
ü Commercial Art Gallery Manager.
ü Brand Ambassador/Sales Promotion Executives.
ü Multimedia Specialist.
ü Community Arts Worker.
ü Advertising Art Director.
ü Marketing Assistant.
ü Web Editor.
ü Photo Retail Sales Assistant.
· Content/Topic 2: Equipment you need to Photoshoot a good camera
Digital Camera
Tripod
Lens
Filters
Rain cot
Reflectors
Camera Batteries
Light External Flash
Camera bag
Laptop
Sound kit
Storage devices
The first piece of equipment you need to start a photography business is a good camera. There are plenty of options out there to consider. Some work better in certain situations than others, so you‘ll want to do a lot of research on what models will work best for your particular niche.
Tripod
A tripod is also an essential piece of equipment, since it can help you keep your camera steady and allow you to take many pictures of each subject without moving the camera around.
Camera Bag
When you‘re transporting your camera from place to place, you need to make sure it‘s protected. So invest in a good camera bag that you can use to keep your camera from getting broken or damaged.
Lighting
Lighting is an essential element of any good photograph. And while natural lighting is usually preferred, you‘ll also likely want to invest in some studio lighting for when there isn‘t sufficient sunlight.
Lenses
There are plenty of different lenses you can use to get different types of images on your camera.
So it can be a good idea to invest in some different lenses to improve the quality of your photos.
Props
It can also be a good idea to have a variety of different props on hand. The types of props you choose can depend on your niche. For example, if you‘re a wedding photographer, you probably won‘t want the same props that a pet photographer uses. But having a few different options can be a good idea.
Learning unit 2: Charge and maintain batteries throughout shoot
L O 2.1. Verify appropriate power supply
· Content/Topic 1: Selection of the appropriate power supply
There are three major kinds of power supplies: unregulated (also called brute force), linear regulated, and switching.
1. Corsair RM850x. The best PSU for PC gaming. ...
2. Cooler Master Master Watt 750W. The best budget power supply. ...
3. FSP Dagger 500W. The best compact power supply for mini-ITX builds. ...
4. Gamdias Astrape P1-750G. The best RGB power supply. ...
5. NZXT E850. The best digital power supply. ...
6. Seasonic Prime 1000 Titanium. The best high end power supply.
What voltage do security cameras use?
What Voltage Camera Do I Need? In general standard CCTV cameras are supplied in three voltages, 120VAC, 24VAC and 12VDC.
· Content/Topic 2: Safety and precautions of power supply
Refer to the Safety Precautions for individual products for precaution specific to each product. Do not touch the Power Controller or the heat sink while the power is being supplied or immediately after the power supply has been turned OFF. Touching the Power Controller or heat sink while it is hot may result in burns.
L O 2.2. Verify the charger if is suitable for the batteries used
· Content/Topic 1: Verification of the voltage range of the charger
When the battery is not being charged and not delivering charge to a load, this is the rule of thumb. For a 12 volt, lead acid battery, the voltage measured between these two points should be between 11 and 13 volts. The closer the voltage is to 13 volts, the closer the battery is to being fully charged.
· Content/Topic 2: Verification of the electricity voltage outlet
Voltage readings will vary and are greatly affected and dependent on whether the battery is being charged, discharged or in storage (rest or ―open cell‖ voltage). There are two terms for voltage readings:
1.Load voltage (voltage under load or on charge)
2.Open cell voltage.
Charge Voltage: When a battery is charged the plates will polarize and develop a resistance to the charge (surface charge). This resistance will add to the battery voltage and therefore using this voltage reading will not reflect the true state of charge. All the so-called ―surface charge‖ will be removed when the battery is being discharged. In general, the battery voltage will recover or increase when the load is removed. This is especially true if the load is very high.
Open Cell Voltage is determined by taking all the loads off of the battery and letting the battery stand for at least 4 hours before taking a reading. This allows the surface charge to dissipate. To get around this problem either use table 2 or determine the 50% state of charge as described.
Determining the 50% state of charge Voltage Reading
Most three steps chargers or inverters monitor the voltage and have an adjustable set point that determines when the batteries are low (50% discharged) and should be charged. Once this setpoint is reached the inverter will either sound an alarm or start a generator or tie the battery bank back into to grid power. The voltage set-point maybe factory set but could require verification.
Consult your inverter manual for the section on ―Cut-off voltage‖ or ―Over discharge protection‖. Since the voltage will change depending on whether or not the bank is on load the set point can be determined by a specific gravity reading. A gravity reading of 1.200 is equal to 50% discharged. Battery cable lengths, system set-up and other variables can affect the voltage readings as well.
Below is a procedure to verify the 50% mark and table 2 gives approximate cut-off voltages at various state of charge. Notice 100% is given as an open cell voltage and all other as under load.
When using a generator with a low voltage cut-off, set the generator to start at the 50% mark given by table 2 and put the bank into service (11.6 V for a 12V system). When the generator starts-up measures the specific gravity of one cell in the bank. Compare this to the table 1, Specific gravity versus state of charge. If the measured specific gravity indicates the state of charge is more than 50%, decrease the low voltage cut-off setting. Similarly, if the specific gravity indicates the state of charge is lower than 50%, increase the low voltage cut-off setting. Note: 50% is the desired depth of discharge but it does not have to be exactly 50%. For practical purposes a range of 45-55% is acceptable. The actual battery voltage corresponding to 50% will change with a change in load. In general, the higher the discharge amperage, the lower the corresponding voltage.
To determine or verify the 50% voltage set point:
1. Put all or as many loads as possible on the battery. Disconnect any in coming current inputs such as panels / windmills and grid power. Contact your dealer for specifics.
2. Take the specific gravity of one cell.
3. Take another reading 15 minutes and ½ hr later this should give you an indication of how fast the batteries are dropping.
4. Continue to take readings until 50-55% state of charge is reached according to the specific gravity readings.
5. Take and record voltage readings (when on load) of any meters to be used for monitoring the state of charge and take a voltage reading across the terminals of one battery.
6. Compare to table 2.
7. These readings will then give you a very accurate voltage reading which can be used in the future either as a set point for the inverter or as a day to day monitoring parameter.

LO 2. 3: - Charge the batteries according to manufacturer's recommendations
· Content/Topic 1: Reading the manual
ü Never short the terminals of a battery.
ü Carrying straps should be used when transporting batteries.
ü Protective clothing, such as rubber apron, rubber gloves, and a face shield should be worn when working with batteries.
ü No smoking, electric sparks, or open flames should be permitted near charging batteries.
Learning unit 3: Install or check digital camera support equipment
L O 3.1: Determine the support requirements and position of digital camera
· Content/Topic 1: Interpretation of shooting plan
Scheduling your film shoot is one of the very first steps in making your project come to life. But in order to schedule, it is our job to figure out how long it will all take – from the length of individual days to the length of the entire project.
There is a way to approach scheduling that will help ensure that the work you do isn‘t in vain.
Let ‘s take a look at a few tips and rules for estimating your prep and shoot times that you want to know for your next project. Let ‘s put some scheduling tips into practical use so that you are armed, and ready to shoot.
1. Break down the scene
There are a ton of moving parts when figuring out how long it will take to plan your movie. If you’re a first assistant director, or producer, you know this well. You’ll get handed a script and know it’s time to break it down. If you’re not familiar with script breakdowns, it’s okay!
2. Collaborate w/ shot lists
Now that you have more information on the elements in the scene, and a general idea of how much time to add for each of them, you can take planning a step further.
3. Make your schedule
Now that we have a better idea of what elements we are dealing with, and an estimate on how long each shot will take, we can start plugging that information directly into our schedule.
4. Scheduling tips cheat sheet
We’ve touched on some of these factors already but we went ahead and put together a handy cheat sheet.
Topic 2: Checking the site attitude for the camera stand
Tripod Mistakes That Could Be Ruining Your Images and Putting Your Camera at Risk
Extending the small leg sections first
All knobs, legs locks, and levers not tightened well enough
Raising the center column
Tripod head mounted to the legs improperly or too loosely
Not setting the tripod legs up on a hill properly (not level)
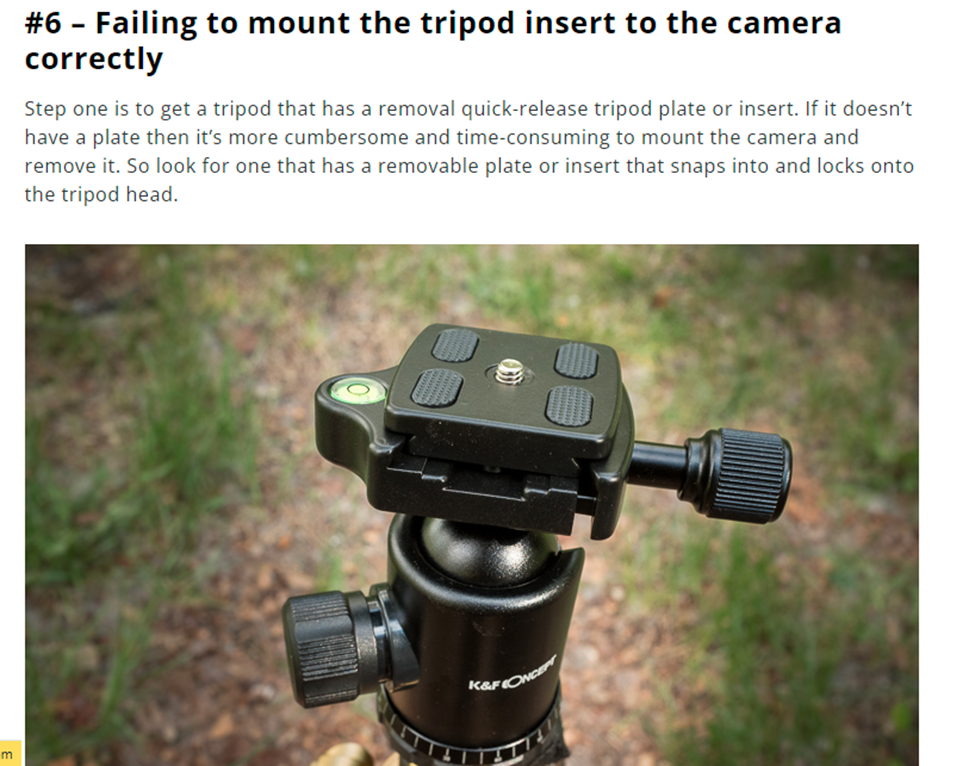
Failing to mount the tripod insert to the camera correctly (too loose or wrong direction)
Failure to mount tripod insert and attached camera on the tripod securely
Positioning the legs incorrectly and standing in the wrong position
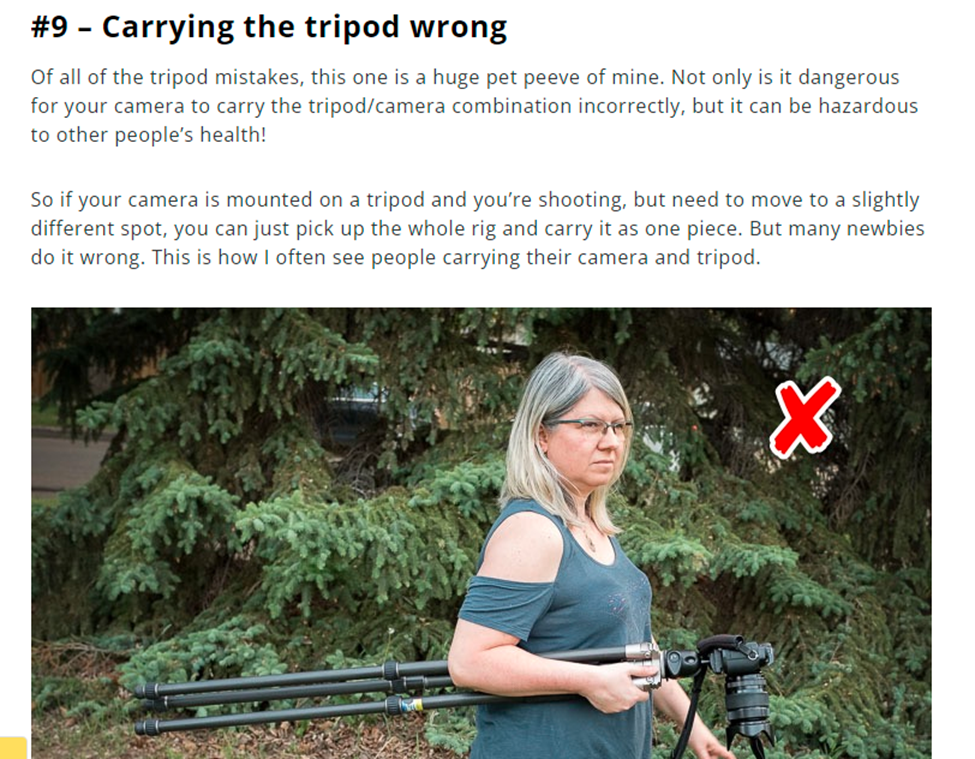
Carrying the tripod wrong
#1 – Extending the small leg sections first
If you only need to unfold your tripod legs part-way, always use the largest (thickest) leg sections at the top first. Then if you need more height, open the lower, thinner leg sections.
I know it’s easier and more convenient, but by extending the small sections first you’re using the weakest parts of the tripod. Keep it steadier by always extending the thicker top leg segments first.

#2 – Not tightening everything enough
This is a simple one, yet I often see tripods with floppy legs, ones that sink slowly to the ground, and ball heads that slowly tilt under the weight of the camera.
Do a simple check that everything is tightened down properly before you ever mount your camera on the tripod. Carry Allen keys (hex wrenches) or any other tools that you need to do this, in your camera bag. It’s a good idea to just do this periodically (like with your spring cleaning habits), but do check it again when you go to use the tripod on site.
Home » Photography Tips » How to Use Your Tripod

9 Tripod Mistakes That Could Be Ruining Your Images and Putting Your Camera at Risk
Are you making any of these tripod mistakes? If so, you could be ruining your chances of getting sharp images (the whole point of using the tripod in the first place!) or worse yet – putting your expensive camera gear at risk of being damaged.
Learning how to use your tripod correctly, when you’re just getting started with your camera, is one of the most valuable skills to have.
Every time I do a photography workshop I see many of these common errors being committed, even by experienced photographers. The issue is that nobody teaches you or talks about how to set up and use a tripod properly.
It is assumed that just by owning a tripod you know how to use it. WRONG!
So, in this tutorial, I will show you how to use a tripod as we go through the dos and don’ts.
9 tripod mistakes you need to avoid
1. Extending the small leg sections first
2. All knobs, legs locks, and levers not tightened well enough
3. Raising the center column
4. Tripod head mounted to the legs improperly or too loosely
5. Not setting the tripod legs up on a hill properly (not level)
6. Failing to mount the tripod insert to the camera correctly (too loose or wrong direction)
7. Failure to mount tripod insert and attached camera on the tripod securely
8. Positioning the legs incorrectly and standing in the wrong position
9. Carrying the tripod wrong
#1 – Extending the small leg sections first
If you only need to unfold your tripod legs part-way, always use the largest (thickest) leg sections at the top first. Then if you need more height, open the lower, thinner leg sections.
I know it’s easier and more convenient, but by extending the small sections first you’re using the weakest parts of the tripod. Keep it steadier by always extending the thicker top leg segments first.

#2 – Not tightening everything enough
This is a simple one, yet I often see tripods with floppy legs, ones that sink slowly to the ground, and ball heads that slowly tilt under the weight of the camera.
Do a simple check that everything is tightened down properly before you ever mount your camera on the tripod. Carry Allen keys (hex wrenches) or any other tools that you need to do this, in your camera bag. It’s a good idea to just do this periodically (like with your spring cleaning habits), but do check it again when you go to use the tripod on site.

Ditto with the center column. Make sure it’s locked down and there is no wiggling. It should not jiggle a little or move up and down easily without loosening the adjustment knob or twist lock.

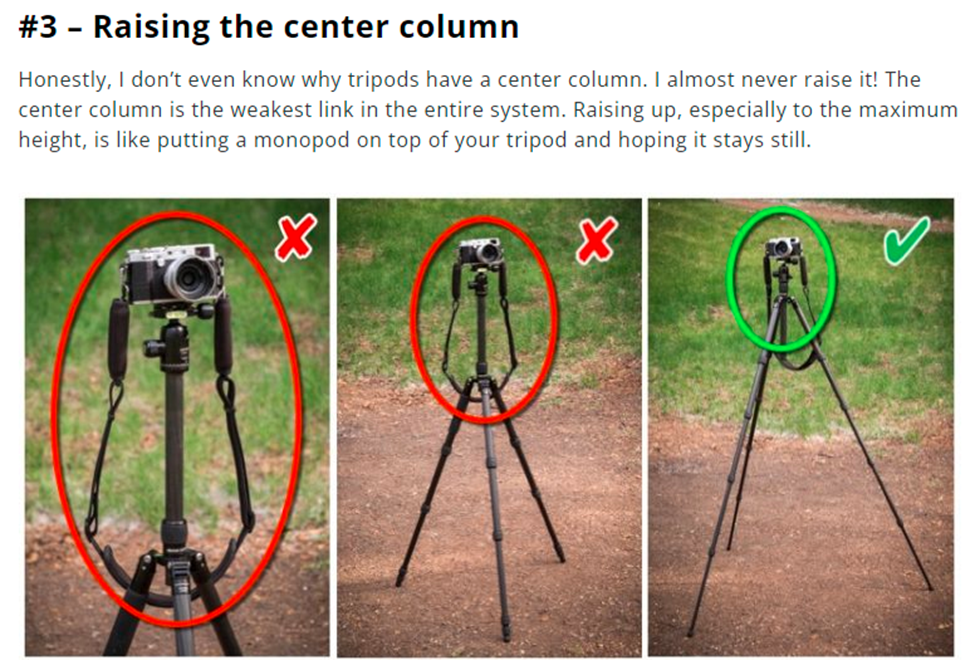
#3 – Raising the center column
Honestly, I don’t even know why tripods have a center column. I almost never raise it! The center column is the weakest link in the entire system. Raising up, especially to the maximum height, is like putting a monopod on top of your tripod and hoping it stays still.

Instead, always extend the legs all the way to their maximum length if you need the height. If that’s still not enough for you, then you may need to look at investing in a tripod that has bigger maximum height.
I’m NOT tall at all (5’0″!) so this is never an issue for me. But if you’re closer to six feet and find you’re always hunching over to look in your camera – it might be time for a bigger tripod. You might even choose to have one that you use when you’re at home and a smaller, more compact one that you use for traveling.
Read this if you need to shop for a bigger tripod: Stress-Free Tips for Buying a Camera Tripod or this might be something to consider if you need a travel one: Tripod Review – the K&F Concept TC2534 Carbon Fiber Tripod.
#4 – Tripod head mounted improperly
This is similar to #2 above. Depending on the tripod, the head may work itself loose and need to be tightened from time to time. So before even putting your camera on top, check that the tripod head is tightly secured to the legs and that it doesn’t rotate or slip if you force it.
If it does, figure out how to tighten it down. Most tripod heads just screw onto the legs so a simple twist is enough. Others have a little screw that needs to be tightened.

#5 – Not setting up on a hill properly
This is the most common issue I see over and over, sometimes even committed by seasoned shooters! Not setting up your tripod correctly on a hill or uneven ground.


· Content/Topic 2: Selection of the appropriate camera stand and its accessories
Crane /Jib

The camera crane system designed to allow you to very smoothly boom your camera up and down, as well as move your camera around in an infinite number of 360-degree arcs. When balanced properly and used correctly, the Camera crane will enable you to move your camera with such precision and fluidity that the results can only be called picture perfect.
Drone

Dolly
The Vector is our most advanced, full featured, hydraulic camera dolly, with higher precision and a lower price.
Vector features include two steering modes, rear wheel steer and all wheel crab, with infinite crab rotation. a hydraulic accumulator system for smooth and quiet boom movement, lifting a camera with straight vertical movement and about 4 lifts per charge.
As with all our dollies, the Vector has a unitized welded body giving it maximum strength and durability for decades of use, and is finished with a black texture powder coat that is sun and chemical resistant.

Tripod
Tripods are used for both still and motion photography to prevent camera movement. They are necessary when slow-speed exposures are being made, or when lenses of extreme focal length are used, as any camera movement while the shutter is open will produce a blurred image.
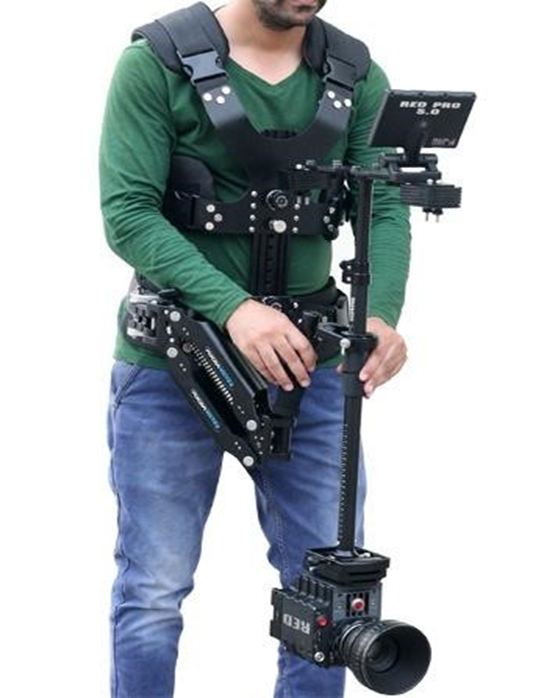
Steady Cam
Steadicam is a brand of camera stabilizer mounts for motion picture cameras invented by Garrett Brown and introduced in 1975 by Cinema Products Corporation. It mechanically isolates the operator's movement, allowing for a smooth shot, even when the camera moves over an irregular surface.

Adjustable 3-Axis Gimbal with Foam Cushioned Handle
Precisely constructed three-axis adjustable gimbal has ball bearings which provide rotational camera control with easy ‗on axis ‘movements. The gimbal can be positioned on the marking scale to adjust the system ‘s vertical balance. It also allows low mode operation. The foam cushioned handle that is attached with the gimbal makes handheld shooting comfortable.
· Content/Topic 3: Determination of the required odd angle of digital camera
EASE OF USE/CONTROL
This high strength Camera stabilization is designed while keeping customer ‘s ease of control in mind. With the help of single stabilization arm, system can be easily & smoothly controlled.

COMFORTABLE JACKET
The Quality constructed jacket ensures immense comfort to operator for long hours of operation. It also allows operator to do adjustments using one hand only. The universal fit accommodates all body sizes.
This Professional Camera Stabilizer not only promises comfort, ease of control & Fast set up but also provides different mounting options. It supports Inverted angle operation for low angle shots.
IMAGEGALLERY

Topic 4:Fixing Reflectors
What are reflectors used for in photography?

In photography and cinematography, a reflector is an improvised or specialised reflective surface used to redirect light towards a given subject or scene.
L O 3.2. install the supports in the appropriate position and at the appropriate height to achieve the digital camera shot required.
· Content/Topic 1: Camera Set up according to the determined angle
Came

ra Position and Angle
• Different camera positions can help tell your story
• Shoot from above or below, as well as from eye level
• Film from different positions around the subject as well
• Make sure your presenter or actors are looking in the right direction
Low angle shots, where the camera points upwards from below, make people (and things) look bigger, more courageous and more important. High angle shots from above usually make people or things look weaker and less powerful.
Camera position
You can position the camera in different places around the subject as well.
A head-on frontal view makes us feel really engaged with the subject. It’s often used as a subjective shot, where we see the person as if we ‘re looking through the eyes of another character. (If your shot isn ‘t meant to be subjective, they should look close to the camera but not directly at it).
The term camera angle describes the position from which we, the audience, are looking at the object or subject. Each new shot should have a new camera angle. There are three reason for this:
Ø Increase the possibility of new information
Ø To increase the possibility of shots editing together
Ø To copy more closely how people, react to new subjects or objects.
When seeing somebody or something for the first time we tend to alter our viewpoints so that we more closely observe what it is we are looking at.it is similar with the selection of the camera angles. a number of factors affect this choice. These factor are:
The types of shot being used
Ø the framing of the shot
Ø the background in the frame
Ø the illusion of depth in shot
Ø the colour and light in the shot
Ø the sound in the shot
The camera angle is referred to in degrees. The “angles on action” refer to the angle from which you photograph a person, event, or action. As we will see, the position of the camera and the view of our subject it offers the audience will impact how much information is conveyed and also the perceived meaning absorbed by the viewer.

Side view of camera tracing path along vertical circle around talent. It is used to create high and low angle shots
· Content/Topic 2: Types of camera supports
ü Crane
ü Drone
ü Dolly
ü Tripod
ü Steady cam
ü Helicopter
L O 3.3. verify the support to its security, avoiding damage to any equipment and provision of satisfactory digital camera support.
· Content/Topic 1: Camera driver abilities
A Webcam Driver is a program which allows communication between your webcam (in-built or external camera on your computer) and your PC. ... If you have updated your operating system or other related hardware or software, then you may need to also update your webcam drivers.
How does USB camera work?
A USB webcam is a camera that connects to a computer, usually through plugging it in to a USB port on the machine. The video is fed to the computer where a software application lets you view the pictures and also transfer them to the Internet.
How do I find my camera driver?
Find your webcam under Cameras, Imaging devices or Sound, video and game controllers. Press and hold (or right-click) the name of your webcam, and then select Properties. Select the Driver tab, select the Driver Details button, and look for a file name that includes stream.sys.
Learning unit 4: Install digital camera, lenses and other accessories
L O 4.1: Select and secure fitting of the correct digital camera lens and filters according to the identified creative requirements
How to choose the right lens for your camera?
How to Pick the Right Camera Lens to Fit Your Needs?
Ø Aperture. Maximum aperture is stated on all lenses. ...
Ø Focal Length. The first thing to consider when choosing your new lens is the focal length. ...
Ø Fixed or Zoom. For most, the most appropriate choice would be a zoom lens. ...
Ø Crop Factor. ...
Ø Image Stabilization. ...
Ø Color Refractive Correction. ...
Ø Distortion. ...
Ø Perspective / Focus Shift.
APERTURE
Maximum aperture is stated on all lenses. It tells you how much light the lens can get through to the sensor at its best. Much light means you can keep shooting in darker conditions without the image blurring due to camera shake. Aperture is provided as an aperture number, such as f/2.8 (or sometimes 1:2.8). The smaller the aperture number, the more light entering the camera. Theoretically, the absolute best aperture you can get is an objective equal to 1, but in practice the brightest lenses offer a maximum aperture of around f/1.2. Most consumers will be satisfied with an aperture number of between f/2.4 and f/3.2. Generally, the higher the aperture number, the cheaper is the lens. Telephoto lenses often have larger aperture numbers.
On zoom lenses, there are usually two aperture numbers (for example, f/2.8–f/5.6). The smaller aperture number indicates the amount of light you get with the widest angle, while the larger shows how much light you get at the maximum zoom.
FOCAL LENGTH
The first thing to consider when choosing your new lens is the focal length. The focal length is given in millimeters and specifies whether the lens is a wide angle or telephoto.
Both have their advantages and disadvantages. With a telephoto lens, you‘ll naturally get closer to subjects far away. Telephoto lenses are also preferred for portraiture as they protect the facial proportions better than a wide angle. With a telephoto lens, it‘s much easier to get a blurred background since telephoto lenses have less depth of field than wide angle lenses. Telephoto lenses usually have usually lower brightness and are more vulnerable to blurriness during the shoot if there is any camera shake. Telephoto lenses are usually physically larger than the wide angle lens.
Wide angle lenses, on the other hand, are fine for nature photography when you want to capture more of the landscape. They ‘re usually good both in brightness and depth of field, and are usually physically smaller and lighter than telephoto lenses. On the negative side the wide angle is not ideal for photographing people, at least not in a pure portrait context. A wide angle gives an impression of greater distance between what is close and what is distant, and it can thus
quickly look like that model has a bigger nose and sunken eyes. You ‘re also more likely to get so-called distortion with a wide angle lens—the straight lines begin to bend into the edges of the image.
The cross between a wide angle and a telephoto lens is called a normal lens. This is a lens that renders the environment as we see with our own eyes (in relation to distance and magnification). In the 135 format, a normal lens is 50mm. Everything with a smaller focal length is called a wide angle, while larger focal lengths are called telephoto.
On regular compact cameras with 3x zoom, the focal length usually extends from 35 mm to 105 mm (according to the 135 format). It‘s important to remember that focal length is connected with the size of the camera‘s image sensor, allowing the focal length of a lens to change depending on which camera it is used on. To avoid too much confusion, it‘s common to explain the focal length equivalent to the so-called full-frame DSLR camera.
FIXED OR ZOOM
For most, the most appropriate choice would be a zoom lens. You get several focal lengths in the same lens and therefore you can get away with fewer lenses to meet your needs. Zoom lenses always have two focal lengths specified, for example 18-55 mm, indicating the zoom range of the lens. If you want this translated into compact camera language, you can just divide the largest number by the smallest, which in the 18–55 mm case gives a zoom of about 3x.
A fixed lens, on the other hand, has some advantages. Fixed lenses are smaller and lighter and usually have better brightness than zoom lenses. It‘s also easier to correct for various lens errors on a fixed lens than on a zoom, so you‘re likely to get improved image quality on a fixed lens (although this will vary somewhat based on price and producer).
Some consider it more artistically correct to use a fixed lens and consider using a zoom to be cheating, in a sense, but it‘s up to each photographer to decide what works best for them.
CROP FACTOR
The various camera manufacturers use different sizes of image sensors in their SLR cameras. This can cause confusion in relation to figuring out the actual capacity of a telephoto or wide angle lens. The most common trick is to convert the focal length to the full frame equivalent. To
make the conversion you need the crop factor. For example, on Canon ‘s SLR cameras without a full frame sensor, the crop factor is 1.6. This means that you must multiply the focal length by 1.6 to determine what it would have been on the 135 (full-frame) format. A range of 18–55 mm will be approximately equal to 29–88 mm.
Ø Nikon – 1.5
Ø Canon – 1.6
Ø Pentax – 1.5
Ø Sony – 1.5
IMAGE STABILIZATION
Although you ‘ll find optical image stabilization in more and more DSLR camera bodies, major manufacturers continue to swear by stabilization in the lens. This is done by moving the elements in the lens, thus eliminating camera shake. Manufacturers such as Olympus, Pentax and Sony all use image stabilization in the camera body, so you won ‘t find lenses with stabilization from these suppliers. Below you can see the abbreviations other manufacturers use to specify that their lenses have built-in image stabilization:
Ø Nikon – VR
Ø Canon – IS
Ø Pentax – Image stabilization in the cameras
Ø Sony – Image stabilization in the cameras
Ø Sigma – OS
Ø Tamron – VC
COLOR REFRACTIVE CORRECTION
Photography focuses entirely on the light, and the headache for lens makers is that light has some strange abilities. One of these is that the different colors of light bend differently when they pass through a lens. This can lead to color shifts, particularly toward the edges in an image. To counteract this, manufacturers are using what they call a low dispersion glass.
Ø Nikon – ED
Ø Pentax – ED
Ø Sigma – APO
Ø Tamron – LD
DISTORTION
Distortion is a different lens error, where straight lines toward the edges of the image are bent either inward or outward. Most lens manufacturers take this into account during construction and correct it in the best possible way, but you might still come across specifications indicating that the lens has correction for this distortion.
Ø Pentax – AL
Ø Sigma – ASP
Ø Tamron – AD
PERSPECTIVE / FOCUS SHIFT
Some lenses have the ability to correct perspective. For example, when shooting a high building you may point the camera slightly upward, and the building will look thinner on top than the bottom. Lens perspective shift can rectify this. These lenses also have the option to change the focus plane so that you can improve or worsen the depth of field. As a common consumer, it is unlikely that you ‘ll need this type of lens.
Ø Nikon – PC
Ø Canon – TS
FOR NON-FULL-SIZE IMAGE SENSORS
After SLR cameras took the step into the digital world, something had to be done with the lenses—first and foremost, because the digital image sensor had a much smaller area than a traditional negative. Since the image surface is smaller, lenses can be made smaller and lighter.
But at the same time, these lenses cannot be used with traditional film cameras or DSLRs with a full frame image sensor.
Ø Nikon – DX
Ø Canon – EF-S
Ø Pentax – DA
Ø Sony – DT
Ø Sigma – DC
FOR FULL-SIZE DIGITAL IMAGE SENSORS
The manufacturers also make lenses for full frame image sensors, of course. These can also be used on regular film SLRs.
Ø Nikon – Lenses are not marked with DX
Ø Canon – EF
Ø Pentax – FA
Ø Sigma – DG
Ø Tamron – DI
MACRO
Macro is a feature many will recognize from compact cameras. It‘s simply the ability to get very close to your subject and be able to take picture of the little things (insects, flowers, etc.).
Ø Nikon – Micro
Ø Canon – Macro
Ø Sigma – Macro
Ø Tamron – Macro
Lens Features
Depending on the quality of their controls, some lenses are easier to use than others. To make sure your lens provides controls that let you get the kind of camera movements and effects that you want, consider the following:
Zoom control. Is the zoom control well positioned? How long does it take to zoom from full wide to full telephoto at the slowest speed? Ideally, this should be about 30 seconds. How quickly can it zoom its full length? You’ll want this to be fairly quick to allow for quick framing of shots. How well does the zoom control work? Can you zoom at a constant speed? Can you make smooth zooming accelerations and decelerations? Is there a knob that allows for very fast zooms, or snap zooms?
Manual focus. If your camera has manual focus, where is the control? Whether electronic or mechanical, test the camera’s manual focus for ease of use and reliability. Also be sure it holds focus when set. If the lens in question has a focusing ring (like what you’d find on a 35mm SLR camera), check to see if it has distances marked on it.
Aperture control. As with focus rings, some higher-end lenses have manual rings for controlling the lens aperture. (Apertures are discussed later in this chapter.) Check for f-stop markings, ease-of-use, and accuracy.
F-stop rating. All lenses have a widest possible f-stop that they can achieve. This determines both low-light capabilities and the ability to shoot shallow depth of field. A lens with a low fstop rating, such as f1.2, can shoot in very low-light situations and achieve extremely shallow depth of field. A lens with a higher f-stop rating, such as f4, will not do as well in low-light situations. Lower numbers mean better low light/shallow depth of field. A lens with a lower number is considered a “faster” lens.
Minimum objective distance. How closely can the lens focus? For shooting small objects or getting extreme close-ups for cutaways, this can be important. Lower-end cameras tend to have lenses built right into the camera’s body, but this doesn’t mean that they’re necessarily bad lenses. In fact, many professional cameras offer high quality, built-in Zeiss lenses.
Zoom lenses. Lenses with variable focal lengths, or zoom lenses, are often the first purchase for camera owners looking to build a collection of lenses. They offer the flexibility That we’ve all become used to, thanks to camcorders with built-in zoom lenses. If you’re shooting under hectic circumstances where changing lenses isn’t an option, or just hoping to travel light, having a good basic zoom lens is important. Focal Length Defined Focal length is the distance from the lens to the camera’s image sensor(s), usually measured in Millimeters.
Prime lenses. Fixed focal length lenses are called prime lenses. Prime lenses typically offer a sharper image than zoom lenses, and they can also have very low f-stop ratings, which Means they can be great for low-light photography. A basic set of primes usually includes a wide angle, a “normal” angle, and a telephoto lens
Exposure
So what, exactly, is exposure? At the most basic level, exposure is the amount of light that is allowed onto the image sensor(s). When too much light falls on the imager, it is overexposed and when there’s not enough light, the image is considered underexposed.
A photograph's exposure determines how light or dark an image will appear when it's been captured by your camera This is determined by just three camera settings: aperture, ISO and shutter speed (the "exposure triangle").

Each setting controls exposure differently:
Aperture: controls the area over which light can enter your camera
Shutter speed: controls the duration of the exposure
ISO speed: controls the sensitivity of your camera's sensor to a given amount of light
General rules for using ISO
You should always try to stick to the lowest ISO (base ISO) of your camera, which is typically ISO 100 or 200, whenever possible. When there is plenty of light, you should always use the lowest ISO, to retain the most detail and to have the highest image quality.
Ø Use an ISO of 100 or 200 when taking photographs outside in sunny conditions.
Ø If the sky is overcast or it is evening time, then use an ISO within the range of 400 to 800.
Ø Night time or in cases of low light you might need to set your digital camera ISO to 1600 if photographing moving subjects like people or if you are hand holding the camera. The result may be a grainy / noisy image;however, it is possible clean that up in post processing.
White balance
White balance is a function on camera which helps to set the electronics of the camera so that they see colors accurately. Each time you change the environment or condition of the light the white balance need also to set. White balance (WB) is the process of removing unrealistic colour casts, so that objects which appear white in person eyes are rendered white in your photo. Proper camera white balance has to take into account the "colour temperature" of a light source, which refers to the relative warmth or coolness of white light. Our eyes are very good at judging what is white under different light sources, but digital cameras often have great difficulty with auto white balance (AWB) — and can create unsightly blue, orange, or even green colour casts. Understanding digital white balance can help you avoid these colour casts, thereby improving your photos under a wider range of lighting conditions.
L O 4.2: Install other digital camera accessories and special requirements
· Content/Topic 1: Essential accessories for your new camera
- 
Camera bags come in many carry styles including backpacks, sling bags, shoulder bags, holster bags, and rolling cases, to name just a few. The style that most people think of when they hear "camera bag" is the traditional camera shoulder bag also referred to as a messenger bag.
Remote release
-

Remote releasing is using a remote control to activate the shutter of the camera. This is to prevent shaking the camera, and is often used with bulb shots and/or tripods.
A remote release allows you to trip the shutter without touching the camera, so it's useful for longer exposures when the camera is on a tripod as it avoids introducing unwanted camera shake.
Many models also act as bulb timers to enable you to take exposures longer than 30 seconds, and interval meters that enable you to take a series of images at specific timer intervals for a specified duration.
There are two types of remote release, those that connect to the camera via a cable and wireless releases. Wireless releases have the advantage of working from a longer range and as you're not physically linked to the camera, you can't introduce any wobble.
-

Reflector, a device that causes reflection (for example, a mirror or a retroreflector) Reflector (photography), used to control lighting contrast. Reflecting telescope. Reflector (antenna), the part of an antenna that reflects radio waves.
A reflector is a quick and affordable way to brighten up your portraits and still life images, giving your shots a high-end professional look.
They're incredibly versatile - use them indoors (near windows) or outdoors to bounce light back onto your subject and to fill-in unwanted shadows.
Many reflectors come double-sided or with detachable covers, so you get a choice of white, silver and gold reflective surfaces, allowing you to get slightly different results depending on what you're looking to achieve. The white surfaces of reflectors can also double up as diffusers to soften strong direct sunshine.
If you're really strapped for cash, you can make a reflector by simply using a large sheet of white cardboard - which you can also cover with tin foil for a silver effect - and it should still work a treat!
-
A dry-cell powered photographic apparatus that holds and electrically triggers a flashbulb. Also called flash unit.

The pop-up flash of your camera (if it has one) is useful for adding a little fill-in light, but you'll get greater power and more flattering results from a flashgun.
Flash diffuser

A flash diffuser is a simple light modifier that attaches to the upper part of an external flash unit. It's used to soften or spread the harsh, concentrated light that bursts out of the flash, creating a more even and flattering light on the subject.
While a flashgun is extremely useful for providing extra illumination, filling in shadows and bringing portraits to life, the light from them can be rather harsh.
A humble piece of translucent plastic can make all the difference, softening the light and making it much more flattering.
There are lots and lots of flash diffusers available on the market, with models that are designed to push-fit onto a flashgun, devices that pop-up to create mini soft boxes and even strange bulb shaped affairs. They are easy to use and on the whole very effective.
- Body
- Power
- Optical Adapter
- Lens
- Remote cable
- Optical Viewfinder
- Stand
L O 4.3: Thorough lifting of digital camera, using safe lifting and handling techniques and secure to support
Content/Topic 1: Our top tips to ensure safer lifting and handling.
1. Assess what needs to be done
Employees should always consider the weights and distances involved, the heights from where a load has to be picked up or set down, and the frequency of the activity. Never lift more than what you can manage safely.
2. Decide what can be lifted safely
Employees will need to make a measured call on what they can safely lift, based on their capability, the nature of the load, environmental conditions and training.
3. Identify ways of reducing the risk
Employees should ask themselves: does the item need to be lifted at all? It may be that the work can be completed somewhere else to avoid lifting the item over a distance. Or there may be lifting aids to help them complete the task mechanically. Perhaps someone else could help too.
4. Rearrange the task
Where possible, it‘s always worth checking whether the task can be re-designed to avoid lifting altogether. If this isn't possible, consider re-arranging the task to minimize the risk. Employees may be able to push instead of pull or break up the distance with more rest points.
5. Assess the nature of the load
Can the load be broken up into smaller items to make it lighter? Can it be made more stable, or easier to grasp? Should circular or irregular-shaped items be packed into boxes instead to prevent rolling?
6. Assess the work environment
Employees should walk the route first and clear any obstructions. Check the walkway - are there uneven surfaces, gradients or blind corners? Avoid steps, ramps, twists and turns. Consider whether the lighting needs to be improved and what personal protective equipment to use.
7. Plan in advance how the task will be carried out
Advance planning and collaboration can help to minimize the risk. Before starting, employees should decide exactly what will be done and how. It might help to have someone walking in front or behind to warn others and watch out for hazards. Plans need to be communicated to others too, including colleagues who work in the vicinity. Pinpoint the optimum time for lifting - perhaps when the area is quieter.
8. Use safe lifting techniques
Safe lifting techniques include adopting a stable position and good posture, keeping the load as close to the body as possible, using the legs and feet (not back), keeping the head up, not twisting, and lifting smoothly.
It‘s a good idea to make yourtraining contentrelevant to the specific employee‘s job role. For example, by using real work-related scenarios specific to your company. This will help keep staff engaged and help to embed the right behaviours and practices.
L O 4.4: Secure digital camera safely to avoid damage
How can you protect your camera from damage?
Content/Topic 2: 5 Tips to Protect Your Camera Gear at The Beach
Ø Cover Your Camera with Rain Gear. It's obvious advice - the best way to prevent moisture from damaging your camera is to keep your camera and lenses dry.
Ø Protect Your Lens with A Filter. Protect the front element of your lens with a filter.
Ø Minimize Lens Changes.
Ø Wipe Moisture Off Quickly.
Ø Clean Your Gear After the Shoot.
Is it bad to leave your lens on your camera?
Only bad things can happen if the lens mount is left gaping open too long. There's no inherent advantage to dismounting a lens except in terms of storage convenience. If you have one lens and one camera body and your camerabag or case can securely carry thecombination, leave the lens mounted.
Should a lens always be detached from a DSLR camera’s body?
The biggest ―should‖ for any DSLR is that the camera body interior should be considered sacrosanct, the holiest of holy sites of photography, not to be sullied by anything. If a body is without a lens, get a body cap on it as quickly as possible. If the body cap is removed to mount a lens, get the lens mounted as quickly as possible. Only bad things can happen if the lens mount is left gaping open too long.
Keep Your Camera Attached to Your Body at All Times
The secret to protecting your camera from drops is pretty simple: your camera should never be able to fall directly onto the ground from a height that can damage it. Instead, it should be attached to your body at all times with a camera strap. As soon as your camera comes out of your bag, put your strap on. Once the strap comes off, your camera goes back in your bag. Follow that maxim, and your camera can ‘t fall.
Be Very Careful Changing Lenses
Changing lenses is one of the times you have to be most careful. It’s when you ‘re most likely to drop a lens or get some dust into your camera.
While it’s impossible to make sure you don ‘t drops your lenses, you can minimize how they far they can fall. If you can, change lenses while placing all your gear on a table. If you ‘re out on location, crouch down and use the ground as a table. In either case, never place any lens element directly on your surface. Put the lens caps on first.
If it‘s raining, there’s lots of dust in the air, or there‘s anything else that could get inside your camera or lens, don‘t change your lens. If you absolutely have to because you need to switch lenses to get the most perfect shot in the world, do it under your coat or in your bag as quickly and carefully as possible.
Use a UV Filter to Protect Against Scratches and Dust
While UV filtersdon‘t do much to protect your lenses from falls, they can protect them from scratches and keep dust away from the front element. Also, some lenses aren‘t weather sealed unless there ‘s a filter attached. For this reason, it‘s a good idea to keep a UV filter, if not permanently on your lens, then at least in your camera bag.
Keep Your Lens Caps On
Lens caps might be small, fiddly, and easy to lose, but they serve a pretty important purpose: they seal your camera and protect it from scratches and small bumps. You obviously need to take your lens cap off to take photos, but when you‘re just wandering around with your camera on its strap, you should put the lens cap on. I can imagine few things worse that scraping your lens because it accidentally bangs off the edge of a metal table.
Air Your Gear Out
If your gear does get a bit damp or covered in sand, air can go a long way towards fixing any potential problems.
If your gear is a little wet from the rain, rather than leave it sitting in your bag to soak when you get home, put it somewhere safe to air out. The water will evaporate and all will be well.
LEARNING UNIT 5: DISASSEMBLE DIGITAL CAMERA, ACCESSORIES AND SUPPORT EQUIPMENT
L O 5.1: Break down and carry digital camera, accessories and supports employing safe lifting techniques Disassembling procedures
Content/Topic 1: Disassembly Guides
Please first consider that any repair that involves opening up the camera case will also require some electrical background and knowledge. Camera disassemblyshould not be attempted by anyone unfamiliar with basic electrical components and safety precautions. Before downloading or following any of these guides, please first read the following post concerning the risk of SEVERE flash capacitor electrical shock, and how to mitigate it when working on the exposed internal components of your camera:
All digital cameras contain a flash capacitor. This device stores quite a bit of electrical energy from the camera's batteries. This energy is utilized to power the camera's flash. The device itself looks a little like a battery, and in turn draws its power from the camera's batteries. In order to work on your camera, it will be necessary to safely drain the capacitor of any residual charge it may have.
Content/Topic 2: Identification of digital camera and accessories
How do you attach a camera strap?
1.Start with the strapfacing the right way: The exposed top and bottom of the strap buckle should be facing outward. Working towards the camera, thread the loose end of the strap through the camera's metal loop. Then thread the loose end of the strap through the little fastener that's attached to the strap.
The Right Way to Attach Your Camera Strap and Avoid Disaster
Here's how to attach your camera strap the right way and ensure your DSLR doesn't become the world's most expensive paperweight.

Caution: YOU ARE NOT DONE! Leaving the camera strap like this is a terrible idea.

Push the upper portion of the strap through the top part of the buckle. This part is just giving you a little bit of slack for the next step.

Thread the loose end of the strap through the top inside end of the buckle first, then back down through the bottom outside opening of the buckle

Obviously, repeat steps 1-3 with the other end of the strap.
You're all set. Your camera should be safe and secure while hanging from your neck, and you won't have any confused loose ends hanging off the buckle.
Content/Topic 3: Identification of digital camera and accessories
Ø Body
Ø Sangles
Ø Power
Ø Optical Adapter
Ø Lens
Ø Flash
Ø Remote cable
Ø Optical Viewfinder
Ø Stand or tripod
Camera straps / sangles
Content/Topic 4: Optical Adapter
What does a lens mount adapter do?
What is a PL mount lens?
Arri PL is a lens mount developed by Arri for use with both 16 mm and 35 mm movie cameras. The PL stands for "positive lock". It is the successor mount to the Arri bayonet; unlike the bayonet mount, however, it is incompatible with older Arri-mount lenses, due to the larger diameter.
Inphotographyandvideography, a lens adapter is a device that enables the use of camera and lens combinations from otherwise incompatible systems. The most simple lens adapter designs, passive lens adapters provide a secure physical connection between the camera and the lens. Some passive adapters may include a mechanism for manualiriscontrol. So called, active lens adapters will include electronic connections, enabling communication between the lens and the camera
L O 5.3: Report and document any equipment that is damaged and requires maintenance to the relevant personnel
Content/Topic 4: Camera and Photographic Equipment Repairers
Repair and adjust cameras and photographic equipment, including commercial video and motion picture camera equipment.
Sample of reported job titles:
Ø Camera Repair Technician
Ø Camera Repairman
Ø Camera Technician
Ø Photo Equipment Technician
Ø Photo Technologist
Skills of Camera and Photographic Equipment Repairers
Ø Troubleshooting— Determining causes of operating errors and deciding what to do about it.
Ø Repairing— Repairing machines or systems using the needed tools.
Ø Critical Thinking— Using logic and reasoning to identify the strengths and weaknesses of alternative solutions, conclusions or approaches to problems.
Ø Equipment Maintenance— Performing routine maintenance on equipment and determining when and what kind of maintenance is needed.
Ø Quality Control Analysis— Conducting tests and inspections of products, services, or processes to evaluate quality or performance.
Here are some basic rules to remember in order to develop good reporting skills.
Ø Be Prepared Before Reporting.
Ø Be Prepared but Not Rigid.
Ø Don't Be Afraid of Silences.
Ø Ask for Clarification.
Ø Ask Fast Talkers to Slow Down.
Qualities or Characteristics of Good or Essential report
Ø Suitable Title. A suitable title has to be provided to each report according to the nature of contents.
Ø Simple.
Ø Promptness.
Ø Comparability.
Ø Consistency.
Ø Precise and Accurate.
Ø Relevant Information.
Content/Topic 5: Applying basic troubleshooting of digital camera and accessories
How do you fix a stuck shutter on a digital camera?
Quick Shutter Repair: How to Fix a Stuck Shutter for Digital.
Step 1 - Turn the camera on.
Step 2 - Camera Mode.
Step 3 - Battery Door.
Step 4 - Repeat.
The symptoms of a stuck shutter typically include the camera taking black pictures, or, if you are taking pictures with your digital camera outside, the pictures may be extremely bright and overexposed. To confirm that the shutter is actually stuck, turn your camera to any mode other than auto, turn the flash off, and look down at the lens and take a picture. If the shutter is functioning properly, you will see a very tiny flicker in the center of the lens as the shutter opens and closes.
Step 1 - Turn the camera on
You will want to turn your camera on and turn off any features that are known to drain the battery of your digital camera. Features like this include the flash and the LCD display. If your camera does not have a viewfinder, however, you will need to keep the LCD display on. If your digital camera is equipped with image stabilization, you will want to turn that off as well.
Step 2 - Camera Mode
To proceed with the shutter repair, you will need to turn the mode dial to any setting except auto.
If you are unsure of which mode to switch to, your digital camera should have a manual mode. While in this mode, you will want to take a picture.
Step 3 - Battery Door
After 7 seconds have passed since you took the picture, open the battery door, or cover it for a few seconds and then close it again. Do not turn the digital camera off while you are doing this. The concept behind this idea is to quickly interrupt power during the exposure time. In most cases, the interruption of power will "jog" the shutter open.
Step 4 - Repeat
After completing the above steps, it is possible that the shutter may still be stuck on your digital camera. It is recommended that you continue to repeat the above steps until the shutter is no longer stuck. You may have to repeat this process five times, or even twenty times. It completely depends on the make and model of your digital camera, and how badly the shutter is stuck and/or damaged.
Common camera Errors
Troubleshooting a Camera Battery Error
Battery errors can also spell trouble for a digital camera. Make sure the battery is fully charged, and check the light on the charger to make sure the charger is working. Check the camera's battery contacts and make sure they are clean by wiping with a dry cloth or using a can of compressed air.
Different types of batteries do not handle extreme temperatures well. If the camera wouldn't turn on while out in high or low temps, take the camera inside and try again after a half hour. If the camera seems fine, then the battery just couldn't handle the temperature. If the battery is old, replacing it may help. (Tip: When shooting in freezing temperatures, keep the battery in your pocket, close to your body heat, until you need it).
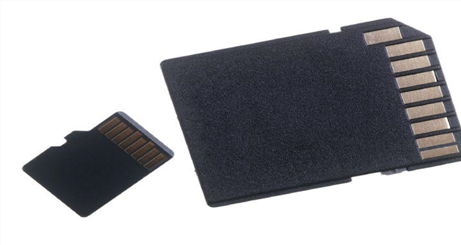
Often, cameras outlive their batteries. Recharging NiCd and NiMh batteries before they are fully drained will decrease their lifespan. Li-ion batteries, which are the most commonly used in newer camera models, tend to last longer and can be recharged even when only partially drained. If the battery life isn't what it used to be, or the camera won't even power up, try replacing the camera battery.
Troubleshooting an SD Card Error
Sometimes, the error isn't the camera, but within the SD card.
If the pictures won't record to the card or the camera displays a ―write error‖ message, first check to make sure the card isn't locked. SD cards have a small switch on one side to prevent any changes to the content, including adding new photos (it's a useful tool for preventing photos from being accidentally deleted).
Different cameras require a different format on the card, so reformatting the card may also solve the issue. Make sure that all the pictures are off the card first. The ―format card‖ option is usually listed in the menu, though different camera models vary.
Dirt, dust and grime can also cause memory card issues. Make sure the metallic parts on the card are clean my wiping it with a cloth; the microfiber cloths designed to clean camera lenses work best. You can also try using a can of air to blow out the camera's SD card slot to make sure there's nothing preventing a good contact with the card.
SD cards are inexpensive to replace, so try using a new one in the camera. If the photos seem to be recording slow, a more advanced SD card can help speed things up. If the card still contains the only copies of some images, look for afilerecoveryprogramonlineor take it in to a repair shop.
Troubleshooting Camera Software Issues
Sometimes, the actual hardware in the camera is working fine but the software has a bug. First, try restoring the camera to the factory settings (this option is often found in the menu, but different models vary). If that doesn't fix the issue, download the latest software update. Google ―firmware updates‖ for your camera model. Updating the software is usually simple and involves adding a file to an SD card, then using a few menu commands from the camera. The firmware update should be accompanied with instructions.
Fixing a Wet Camera
Camera mishaps with water or other liquids are common. Depending on how much water gets inside, the camera may or may not be salvaged. First, do not turn it on. Wait at least a week to let it dry out. Open any compartments (like the battery compartment) and leave it alone. As tempting as it is to see if the camera still works, turning it on before it dries out could fry the electrical components if they were not already damaged. If the camera was doused with salt water or another liquid, wipe the camera and any compartments clean. After the camera is dry, then turn it on to assess the damage. The camera may need new batteries and an SD card.
Troubleshooting: When to Buy New
Unfortunately, not every common camera mishap is a do-it-yourself job. Some shops offer camera repair, but it is typically very expensive. In many cases, buying a new camera is a better option. Buying refurbished or the previous year's model can help you save money when upgrading. Here are a few of the scenarios where upgrading is the best option:
When repair is more expensive than replacing. If your point-and-shoot camera is broken, chances are, fixing it will cost around the same as a replacement. Call a repair shop to be sure, but unfortunately, this is the case more often than not. More expensive cameras, likeDSLRs, may be worth the repair costs, but the reality is that inexpensive cameras are seldom worth the repair fees.
When there's an issue with thesensor. Sensor problems are difficult and expensive to fix.
Again, find an estimate to be sure, but replacement is usually the best option.
When the camera is old. If you are still shooting with a camera that has megapixels in the single digits and there's an issue with the camera, the best bet is to upgrade. Old digital cameras aren't worth much, and sometimes even the cost of a new battery is worth more than the camera itself. Digital cameras have come a long way in the last five years, you may be surprised by the improvement in quality, even with an inexpensive point-and-shoot.


:max_bytes(150000):strip_icc()/GettyImages-171266014-5bcdef29c9e77c0051365aed.jpg)
0 Comments